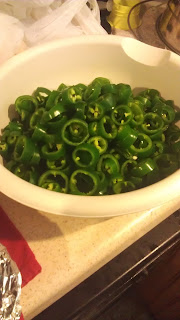
I came home and got them washed and sliced....
DON'T FORGET YOUR GLOVES FOR THIS STEP! No really - you will thank me for reminding you!
While you are working on the slicing and dicing...it's a good idea to get your jars ready. Some people run them through the dishwasher...I'm not running the dishwasher for a half a rack of jars...so I wash mine well, then plop them into the canning pot to boil while I work. LIDS TOO! Don't forget your lids and rings :) Of course, I set those simmering in a smaller pot - that way they are easier to fish out when I am ready for them.
(The water isn't really ucky - that's my poor lighting and photography at play).
Now that your jars are ready, and your jalapenos are ready, you will need a brine to pickle them! This part is easy peasy. Takes a few minutes, and just basic cooking skills. Okay, here goes:
Pickled Jalapeno Brine
one whole onion, quartered and sliced
(leave them kind of on the big side...for fishing out of the jar and eating later :) )
3 - 4 cloves of garlic, diced chunky
1 tbsp oil (any kind, it's just enough to saute the onions and garlic)
7 cups 5% vinegar (can be white, or ACV or a blend)
1 cup water
4 tsp pickling salt
2 tsp sugar
1 tsp oregano
1 bay leaf
1/8 tsp ground cumin
Saute your onions and garlic (use just enough oil so they don't stick to the pan - but not too much! You don't want a bunch of oil in this!) - now, this part is up to you, but I like mine to be about medium cooked. Not really carmelized, but not hard...I like the flavor it adds to the brine and jalapenos, but you can even skip all the seasonings if you want.
Add the rest of the ingredients - ALL of them - and bring to a boil. Allow to boil for one minute, just enough to get the flavors to start infusing together.
Okay - so now your brine is ready. Let it cool just a bit, get your handy dandy jar funnel ready, pull your jars from their warm toast water bath (or oven, or dishwasher - however you keep them warm once sterile). You are gonna start by packing them fairly full of jalapenos - not so tight you are squishing stuff in there, but tight enough....the peppers are gonna shrink up and wilt a bit when you add the hot brine!
Using your funnel, and a clean ladle, fill the jars about 2/3 full of brine - Now, I personally LIKE the bigger chunks of onions, so I make sure each jar gets a healthy dose of them :) With this many jalapenos I start with about 5 pint jars....there will be peppers left over in your bowl! Now, when I get to the last jar, I go back to the first one, take a spoon, and kind of mash things down in there...adding more jalapenos to the top just about. Repeat on down the line, then add more brine to each jar....repeat again....
With this batch I had 6 jars pretty well full of peppers and brine! You want about 1/4 inch of head space, wipe your rims clean, and place lids and rings on there just "finger tight". Then it's time to place in a boiling water bath for about 10 minutes, remove, let cool and wait for the "precious pings"!
***NOTE*** When making any brine, jelly, salsa, or high acid food be SURE to use a "non reactive" pot! Stainless steel, glass - NOT aluminum! Other wise the acid contents of the food will eat the metal off of the pot, deposit it in your food, and leave you with a ucky nasty flavor! Just saying....that's what I was always taught....
Now we wait...as long as we can...but just a couple weeks really. This allows them to "stew in their juices" as it were...once they have had time to set a bit, these will be AWESOME in fresh chevre, on omelets, on everything! I think we might make it one or 2 days more before we dive into a jar....I'll keep you posted!


No comments:
Post a Comment